How To Make An Herb Drying Rack and Harvest Herbs

It’s Herb harvesting time in my house today. Nothing like walking into a kitchen that smells full of fragrant herbs, who needs candles! I was looking out at my garden today and realized that my herbs needed to be cut back because they were taking over. I decided to get crafty and make a drying rack in my kitchen for them. This was easy and it took me about 45 minutes from start to finish (with a photo shoot!)
Process:
- Get a piece of 1×1 wood and cut it to the preferred length (I used a skill saw but any saw will do!)

- Pre- drill holes in the board about an inch apart for as many herbs as you want to dry. I used a 7/64 inch drill bit but you can use whatever size for the types of screws you have. (Pre-drilling is important because it will keep your 1×1 board from cracking.)

- Next Pre- drill in your screws (I used 1 5/8 inch) until just the tip is poking out the back of the 1×1 board.

- Find a place to hang your rack and locate the studs.
- Drill the screws on both ends all the way into the wall, if both ends are not in studs than find the screw that is on another stud and screw that in too.
- Then screw into the wall a little so they are secured but leave enough out that you can hang your herbs on.
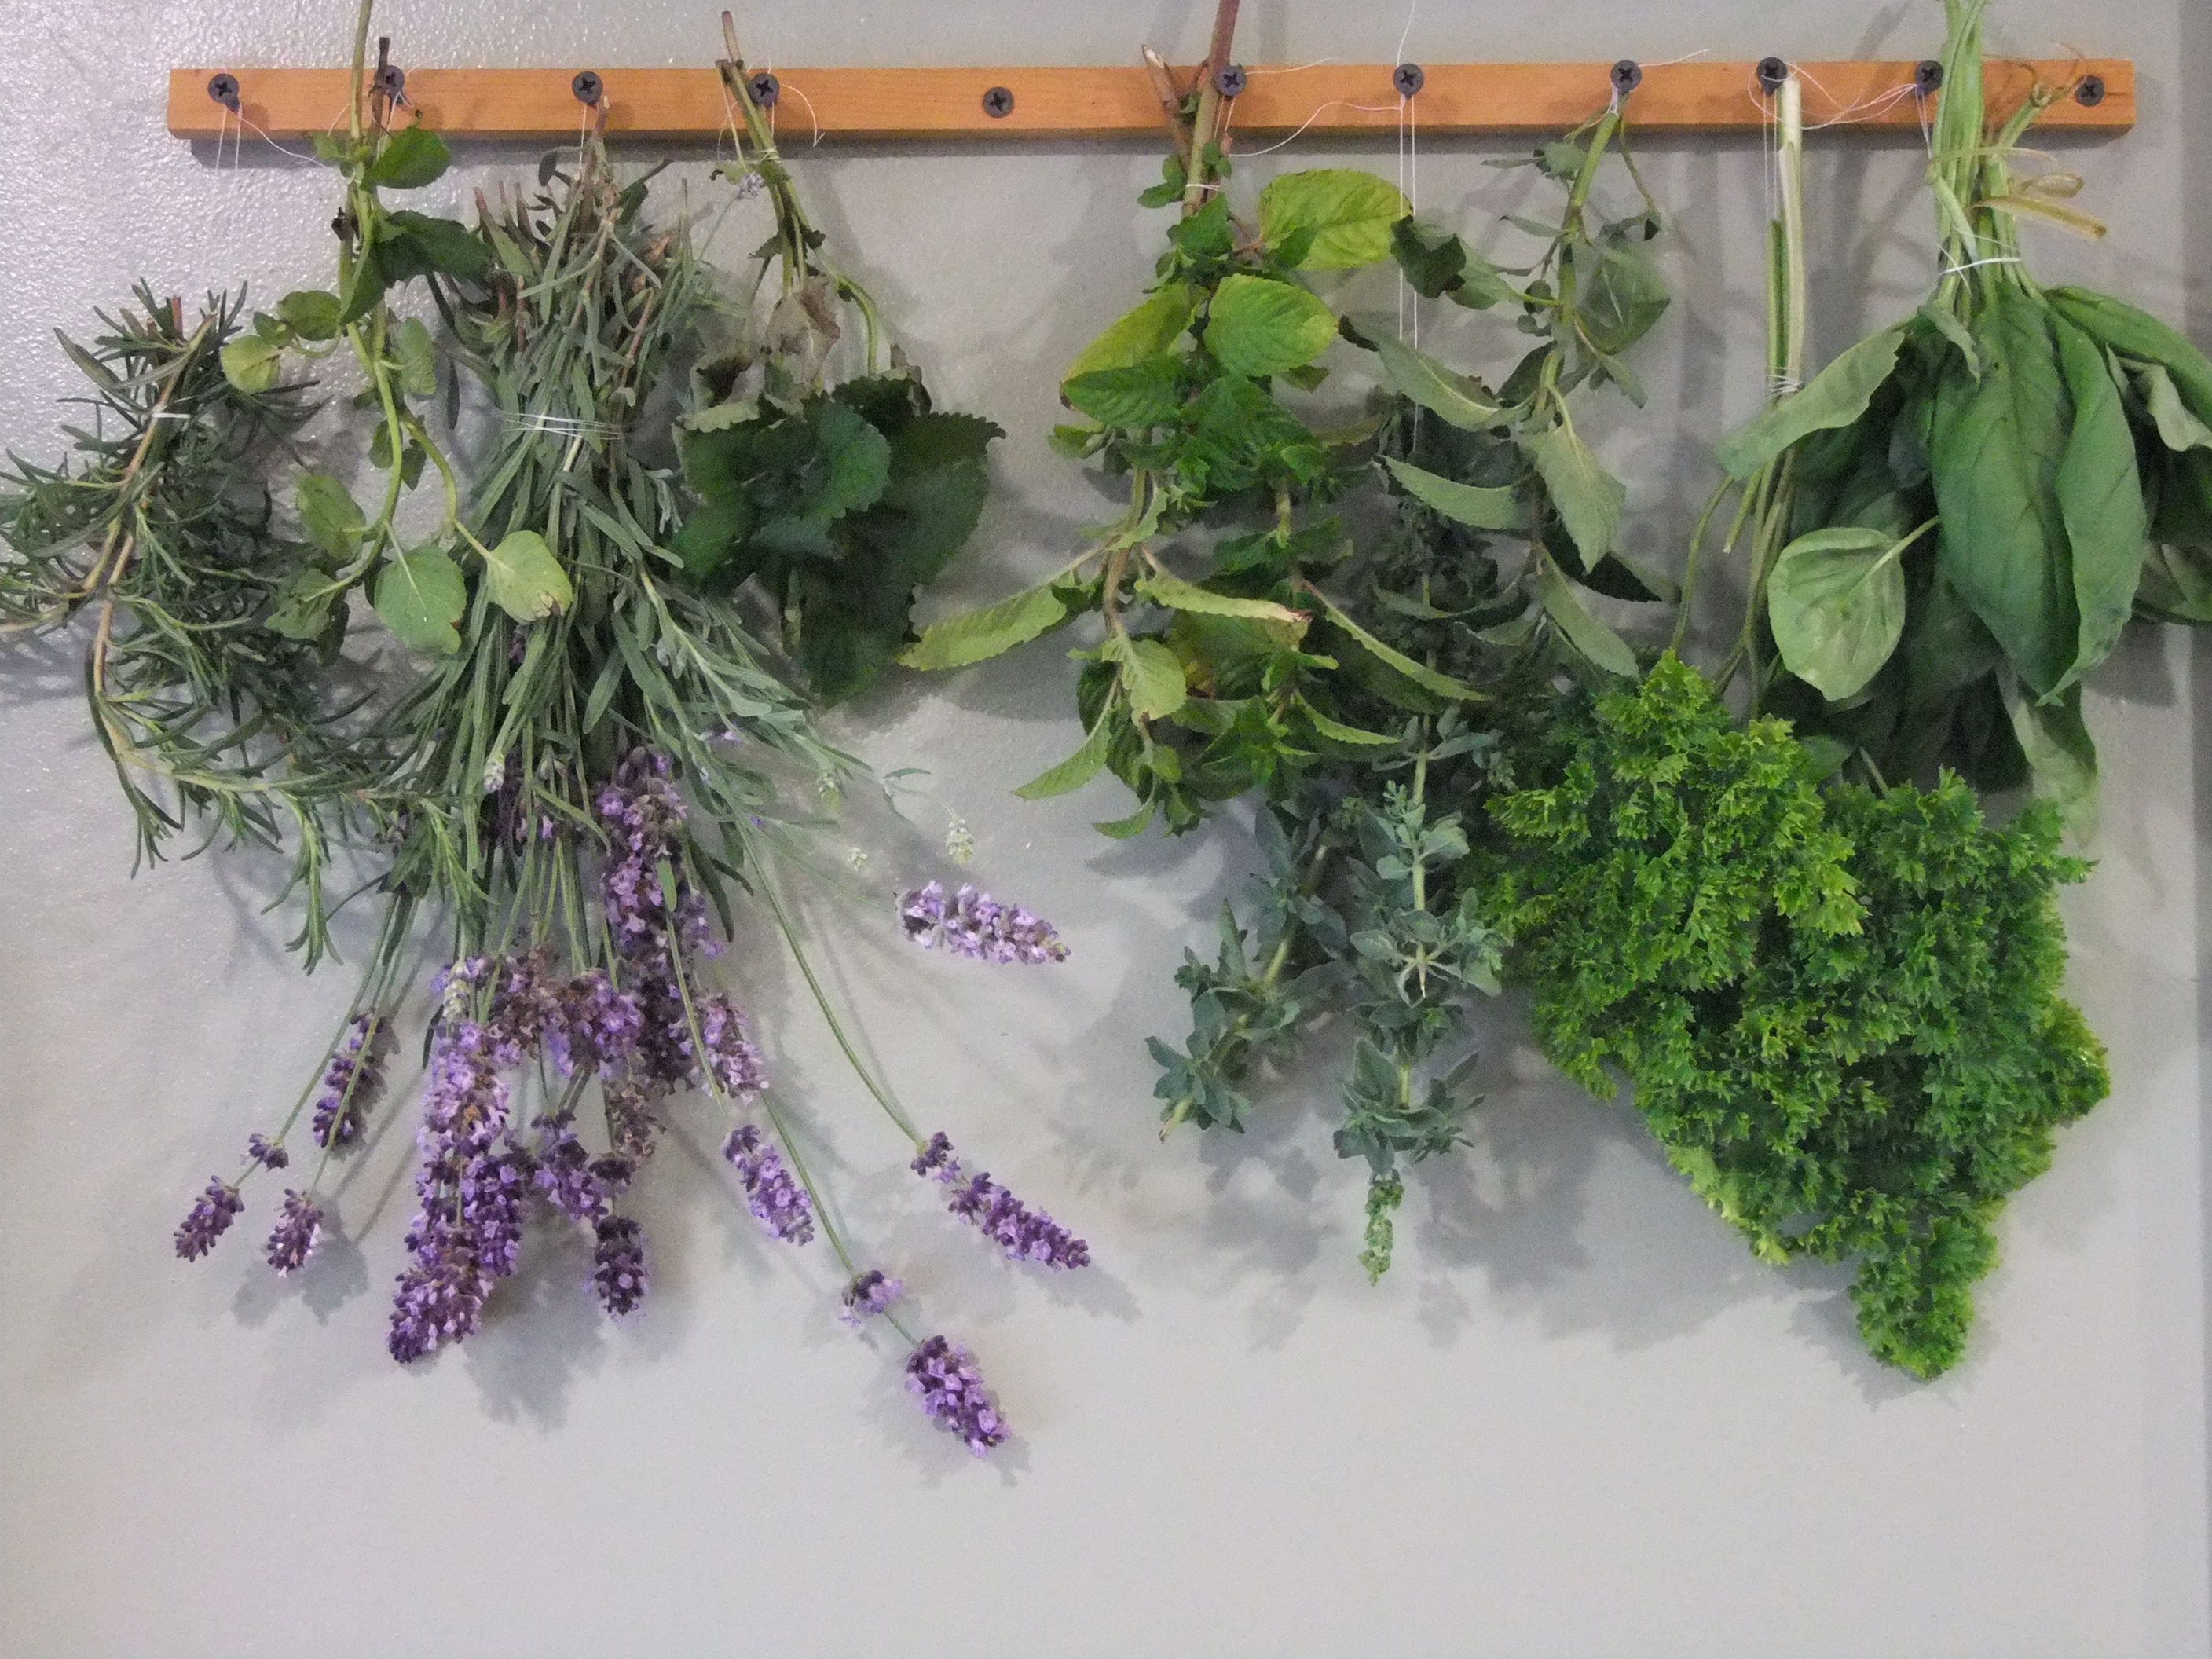
- Pick your herbs, bunch them and tie them at the ends with string or yarn.
- Hang your herbs from the screws and enjoy the fragrant smell for days.

In a few weeks, your herbs will be dried out and ready to grind and bottle for seasonings, teas and flavoring to your favorite meals!